I am quite fond of using a simple compressor and a subtle noise filter, that doesn’t fully remove all the background noise to process production audio.
Here is my workflow in Audition:
Export audio
- Solo the microphone audio layer from the timeline and set your in/out points.
- On the top-right of Premiere, press the share icon, which will open the Quick Export dialogue.
- Select the
WAV 48 kHz16-bitpreset and choose a File Name & Location - usually the Audio folder in the root of the job folder. - Press
Export
Import & Backup:
- Once exported, Right-click on the audio file in the Files panel and select
Duplicateto create a backup. - Drag/drop the exported audio file into audition.
In Audition
Normalise Levels:
- Highlight the entire audio waveform.
- Go to
Effects > Amplitude and Compression > Normalize (Process). - Set the dB level to -3dB and click
Apply.
Noise Reduction:
- Highlight a short section of the audio where only the background noise is present. (avoid breathing, and wait for a few beats after they finish talking to avoid echo)
- Go to
Effects > Noise Reduction / Restoration > Capture Noise Print. Or use the shortcut -Shift + P. - Then, highlight the entire audio waveform. You can use
CMD/CTRL + A - Go to
Effects > Noise Reduction / Restoration > Noise Reduction (Process)or use the shortcut -CMD/CTRL + Shift + P
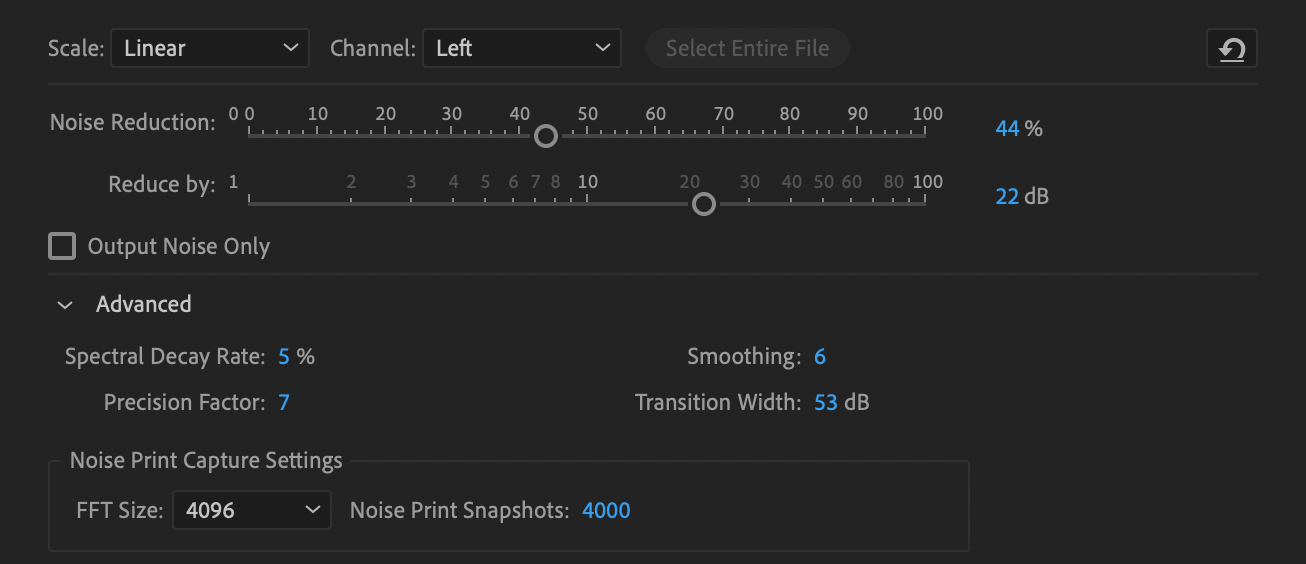
Noise Reduction settings:
Standard noise reduction
- Noise Reduction: between 50 - 70%. The higher you go, the more you loose the detail in the voice and it sounds like a cheap speaker.
- Reduce by: 15 - 25 dB. Same effect as above, but you can play with these values.
- Spectral Decay Rate: between 30 - 60%. The lower it is, the more “tinny” the audio sounds.
- Smoothing: Between 7 - 12.
- Precision Factor: 7
- Transition Width: 6 dB
Noisy environment
If all else fails, just highlight a short bit of dialogue and listen to how the settings above affect it.
Dynamic Range Compression:
- Highlight the audio waveform.
- Go to
Effects > Amplitude and Compression > Dynamics. - In the compressor section, a good starting point is with:
- 1.5 - 3 ratio,
- -25 dB Threshold,
- drop the attack to 0.25 ms,
- release to 500 ms.
- I also use the Expander with a -20 dB Threshold and a 1.5 - 2 Ratio.
Normalise to -3 db before exporting
I have found that -3db is the best middle ground for voice so that you still have some wiggle room with music etc. We’ve been setting all mic audio to -3db since 2023
Export:
- Press
CMD/CTRL + Sto save the file over the original.