In this tutorial you will export a video from Premiere Pro and prepare it for a client. Along the way you will use Media Encoder to render the video, HandBrake to compress the video and WeTransfer to upload the completed file.
Premiere Pro
First, in Premiere Pro, set the in and out points on the timeline, so they highlight the portion of the edit you want to export. Your timeline should look something like this:
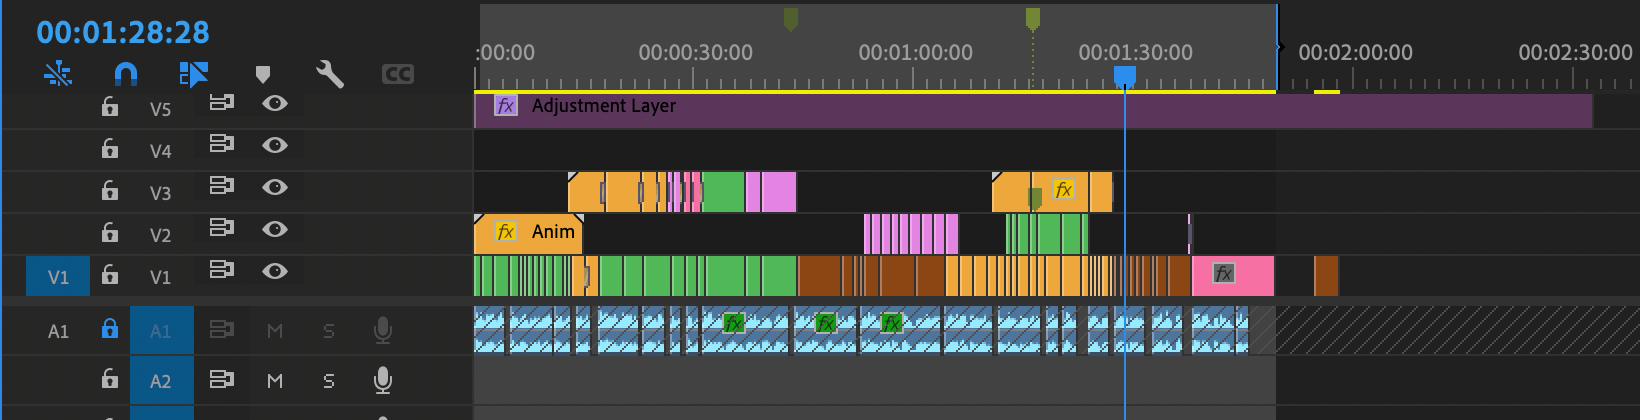
Any clips you wish to be excluded, should be to the right of the out point in the timeline.
Next, navigate to File > Export > Send to Media Encoder
or press ⌥ (option) + ⇧ (shift) + M
Media Encoder
This will open Media Encoder (if it was not open already) and create a new source in the Queue. The Media Encoder window won’t pop up automatically, so you might need to hunt it down in the MacOS dock at the bottom of your screen.
For your source’s Preset, select:
H264 10Mbps - QT Gamma
(if you don’t have it, check out Setting up Media Encoder)
Double-check the export settings, and press OK on the bottom-right. Choose your output destination and name, by clicking on the Output File column. Set the file output to the Final PrePress folder of the job you’re working on.
HandBrake
Lastly, we move on to HandBrake.
Drag the rendered video to the HandBrake window, which will set that video as the source. Click Browse... in the bottom right, and drag/drop the video again in the finder window that just popped up to set the output destination to the same folder:
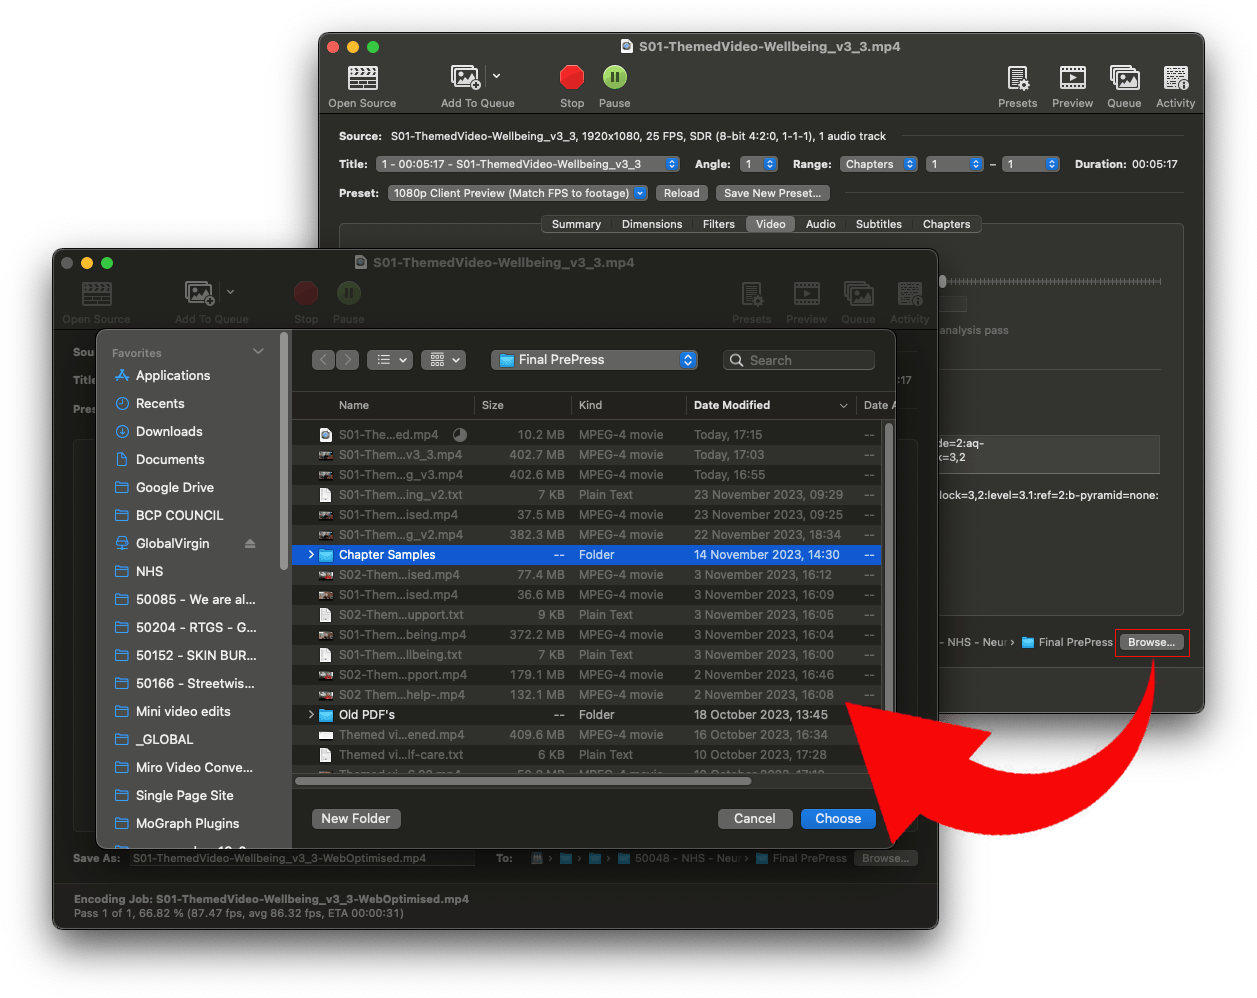
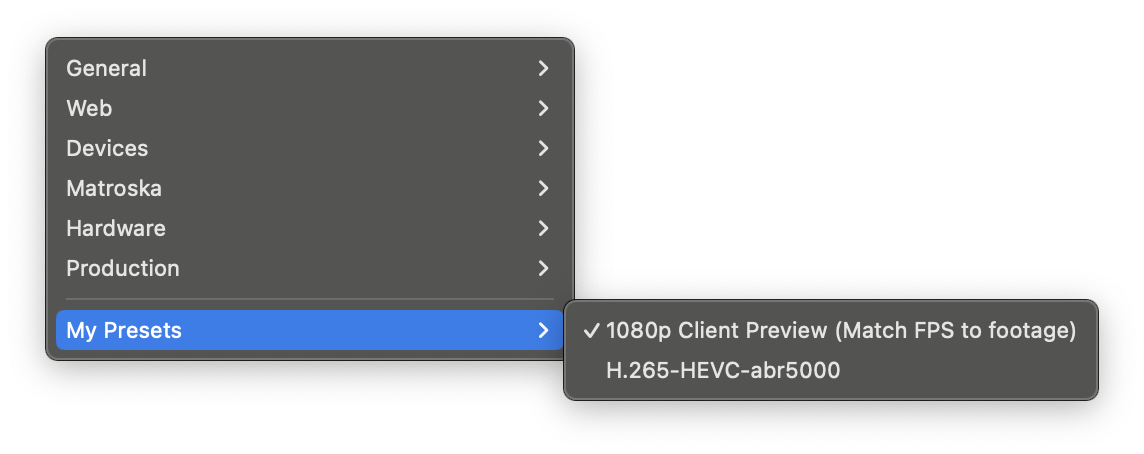
Click Choose. Now navigate to Preset, and select:
1080p Client Preview (Match FPS to footage)
(If you don’t have it, check out Setting up HandBrake)
OLD
1. Export with Media Encoder
When your video is ready, export it from Premiere Pro by choosing:
File > Export > Send to Media Encoder
From the preset, choose “Match Source - High bitrate”, and apply a LUT, like this:
- Edit the preset by clicking on it,
- Open “Effects” panel,
- Scroll down to “Lumetri Look / LUT” and enable it,
- Click on “Applied:” and click “Select…”
- From the opened finder window and navigate to “/Volumes/_Resources/MoGraph Plugins/“
- Find “QT Gamma Compensation.cube” and open it (it should have a green tag),
- Press OK in the bottom right corner.
The reason we use the QT Gamma Compensation LUT is because exporting from After Effects and Premiere Pro tend
From there export your file, following our Naming conventions.
2. Compress the exported video with HandBrake
We use HandBrake to compress videos so we don’t compromise on quality. Media Encoder has numerously proved itself unreliable to do basic compression, which is why we now use HandBrake to compress.
Using HandBrake is very simple, even if it might look complex. Here’s how to compress your exported file: